 English
 русский
 عربى
عربى Español
Qinlang focuses on providing high-quality products and considerate services, and is committed to meeting every expectation of our customers.
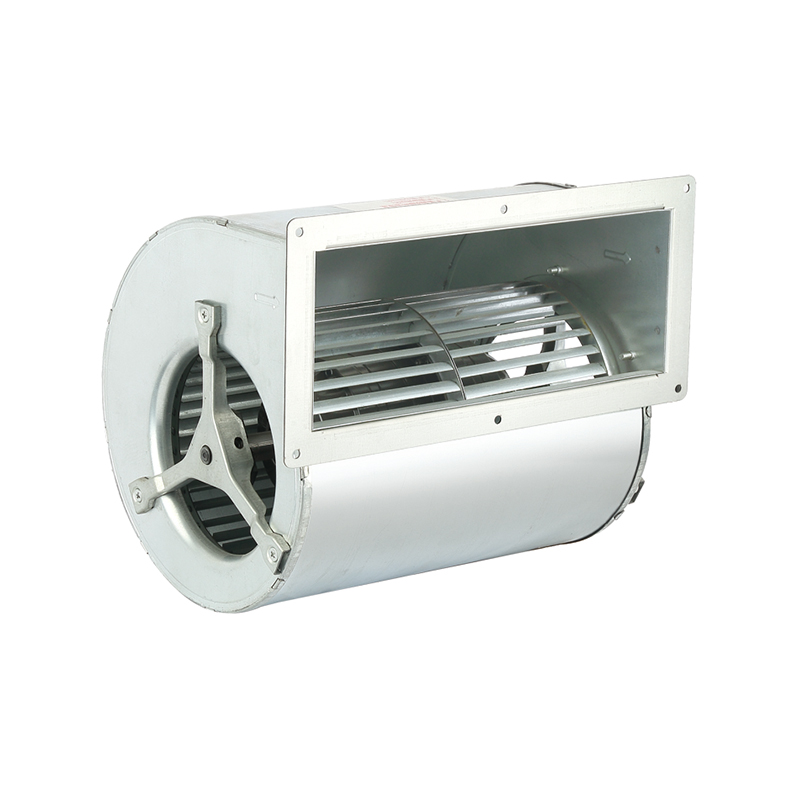
The DKT-133 Cooling Ventilation Double Inlet Air Conditioning Fan is d...
See DetailsLow noise duct fan is designed to move air through duct systems while producing only a gentle, unobtrusive sound. They are a common choice whenever people need reliable ventilation but do not want the typical whir, hum, or rush of air that comes from ordinary fans. You find them in private homes, apartments, small offices, medical waiting rooms, workshops, garages, indoor growing spaces, and many other locations where background noise matters.
Picking the correct fan means looking at your actual space, duct setup, and what you want the system to do. Here are the key points most people need to consider.
Air movement requirement
Every room or area has a basic need for fresh air exchange. A compact half-bathroom usually requires less air movement than a full family bathroom with a large shower, and both need far less than an open kitchen that sees heavy cooking several times a day. Think about what you are trying to remove—steam, cooking odors, laundry moisture, workshop dust, pet smells—and how quickly you want it gone. Longer duct runs, sharp turns, dampers, grilles, and any filters all make it harder for air to move, so the fan has to be capable enough to push or pull through that resistance without straining.
Duct connection size
Most home and light commercial ductwork uses round metal or flexible ducts in a handful of common sizes: 4 inches, 5 inches, 6 inches, 8 inches, 10 inches, or occasionally 12 inches. Measure the duct you plan to connect to very carefully. The fan's inlet and outlet collars should line up as closely as possible. Even a half-inch difference often forces the use of awkward reducers or increasers, and those transitions almost always create turbulence, air leaks at the joints, and extra noise.
How quiet it really needs to be
The whole point of a low noise model is to avoid disturbing people in nearby rooms. Some fans are built with slower blade speeds, smoother motor operation, better balancing, or insulated outer casings to keep sound down. But placement usually matters even more than the fan's own design features. Installing the unit in an attic, crawl space, basement, mechanical closet, or above a drop ceiling takes most of the sound away from living areas. When the fan must sit closer to occupied rooms, look for models that carry notes about suitability for quiet or residential environments.
Motor design
Newer low noise fans frequently use electronically commutated motors. These motors tend to:
Older-style AC motors are still found in lower-cost models. They can work well but generally produce more noticeable hum, especially when running at full power for extended times.
Electricity consumption
If the fan will run for several hours each day—common in bathrooms, kitchens, whole-house systems, or grow rooms—a model that delivers the needed airflow while drawing fewer watts will cost noticeably less to operate over months and years.
Build quality and materials
Housing materials include:
Impellers are typically plastic or coated metal. Sealed, permanently lubricated bearings are standard on most quiet models and mean you never have to add oil.
Mounting positions allowed
Some fans are approved only for horizontal installation. Others carry approval for vertical, horizontal, or angled mounting. Check this before buying if your planned location requires a specific orientation.
Convenience features worth having
Many models offer one or more of these:
Quick decision checklist
Typical home applications
Small commercial and professional settings
Hobby, workshop, and niche uses
Real improvements people notice
Always switch power off at the breaker and confirm it is dead before starting any work.
Step 1: Pick the best location
Attics, basements, crawl spaces, closets, or ceiling voids are ideal because distance reduces noise in living areas.
Step 2: Prepare the duct path
Cut duct sections cleanly. Try to include at least 12–24 inches of straight duct immediately before and after the fan. This smooths airflow and cuts turbulence noise.
Step 3: Connect the fan to the duct
Slide the duct over the fan collars. Secure every joint tightly with stainless steel hose clamps or approved metal foil tape. Avoid regular duct tape—it fails quickly.
Step 4: Mount the unit securely
Use manufacturer-supplied brackets, hanging straps, or saddle supports. Place rubber isolators, neoprene pads, or anti-vibration grommets between the fan and the building structure to stop vibration from traveling through joists or framing.
Step 5: Make electrical connections
Follow the wiring diagram exactly. Connect to an appropriate switch, timer, or control module. Ensure proper grounding. In damp locations, use a GFCI-protected circuit when required by code.
Step 6: Test the complete system
Routine Maintenance That Keeps Noise and Performance Steady
Basic cleaning schedule (recommended every 6–12 months)
Quick monthly or quarterly checks
Most low noise duct fans use sealed bearings that never need lubrication. Do not attempt to disassemble sealed motor sections unless you are a qualified technician.
Smart Questions to Ask Sellers or Check in Product Details
A low noise duct fan becomes an almost invisible part of a ventilation system when you choose one that matches your duct size and airflow needs, install it in a smart location with good isolation, and give it basic cleaning once or twice a year.
The DKT-133 Cooling Ventilation Double Inlet Air Conditioning Fan is d...
See Details
The DKT-146 Multi-Function Variable Frequency Double Inlet Air Conditi...
See Details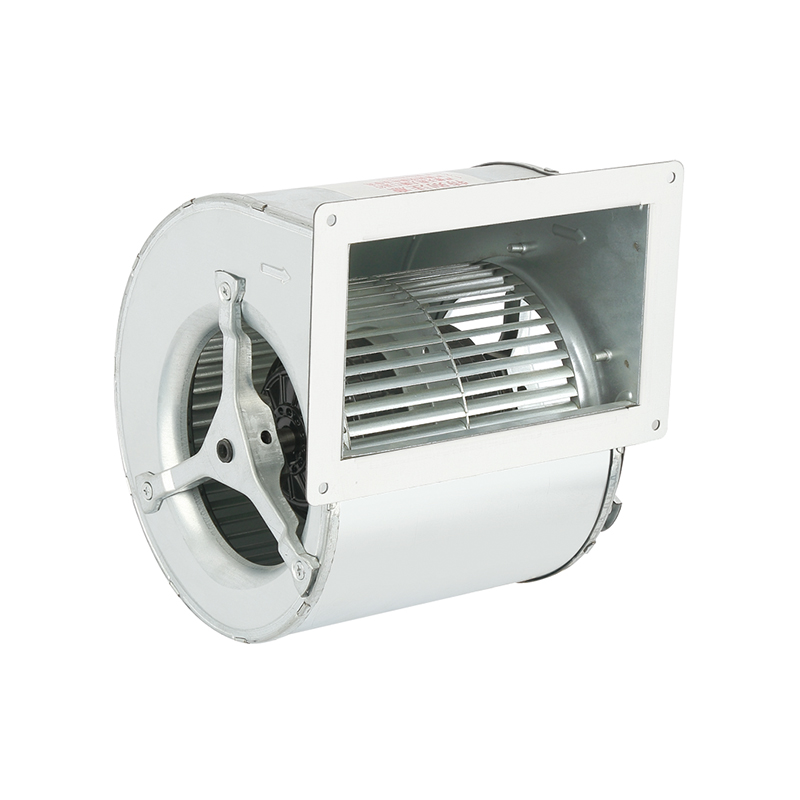
The DKT-160 Heat Dissipation Exhaust Double Inlet Air Conditioning Fan...
See Details
The DKT-180 Tilt Back Cool Down Double Inlet Air Conditioning Fan, a s...
See Details
The YWF-400-2D2E Efficient Square form Axial fan is designed with a fo...
See Details
The YWF-350-2D2E Low noise Square form Axial Fan is designed with a co...
See Details
The YWF-350-4D4E Low vibration Square form Axial Fan is a outstanding ...
See Details
The YWF-400-4D4E Durable Square form Axial Fan is designed with advanc...
See DetailsQinlang focuses on providing high-quality products and considerate services, and is committed to meeting every expectation of our customers.
© Zhejiang Qinlang Electromechanical Co., Ltd.
Fans And Air-Cooling Equipment Factory
